
Some eighteen months ago I posted this picture on my Instagram feed. These are small felt tape measure containers that my mother made. Several people were kind enough to be interested in these little containers, and I was asked if I had a pattern. Well, I didn’t, but now – over a year later – yes, I do!
I started by examining the oldest tape measure tidy quite carefully. It’s all made from felt with just a cardboard inner at the base and in the lid. All the stitching is buttonhole stitch (also known as blanket stitch), but it is a little bit fancier on the lid, with some woven threads to enhance the buttonhole stitch. It’s very old (with a few mothy marks on the bottom). I’ve had it as long as I can remember, and I really treasure it.


 I think my mother made the other two tape measure tidies much later in life for sale at her local church. Although she’s used a different stitch (an Oversewing stitch), the decorations on the lid and the rest of the work are very similar to the old one. The only real difference I can identify (apart from the stitches) is that she has lined the cylinder with card.

 To make one of these tape measure tidies, you will need:
- Thick cardboard to make your own templates
- Thin cardboard for lining
- Felt
- Beads
- Embroidery floss (I used three strands of DMC or Anchor embroidery cotton)
- Fabric glue (I used Impex Hi-tac Fabric glue)
You first need to select your felt colours. Here are the templates I worked with, devised from my mother’s old work.
 Use the templates shown above to cut:
- one large rectangle (3 x 11.9cm) of felt for the outside of the cylindrical case
- one smaller rectangle (2.7 x 11.6cm) of felt for the inside of the cylindrical case
- one smaller rectangle (2.7 x 11.6cm)of thin cardboard for the lining of the cylindrical case
- three large rounds (3.8cm diameter) of felt for the outer base of the cylinder and the top and bottom of the lid
- one small round (3.5cm diameter) of felt for the inner base of the cylinder
- two small rounds (3.5cm diameter) of thin cardboard for the linings of the base of the cylinder and the lid
First assemble the pieces to make the cylinder and its base. Glue the inner cardboard to the outer felt.
  And then glue the felt lining to the already glued pieces to make a felt-cardboard-felt sandwich.
 Before the glue dries, it is important to work this sandwich into a curved shape.
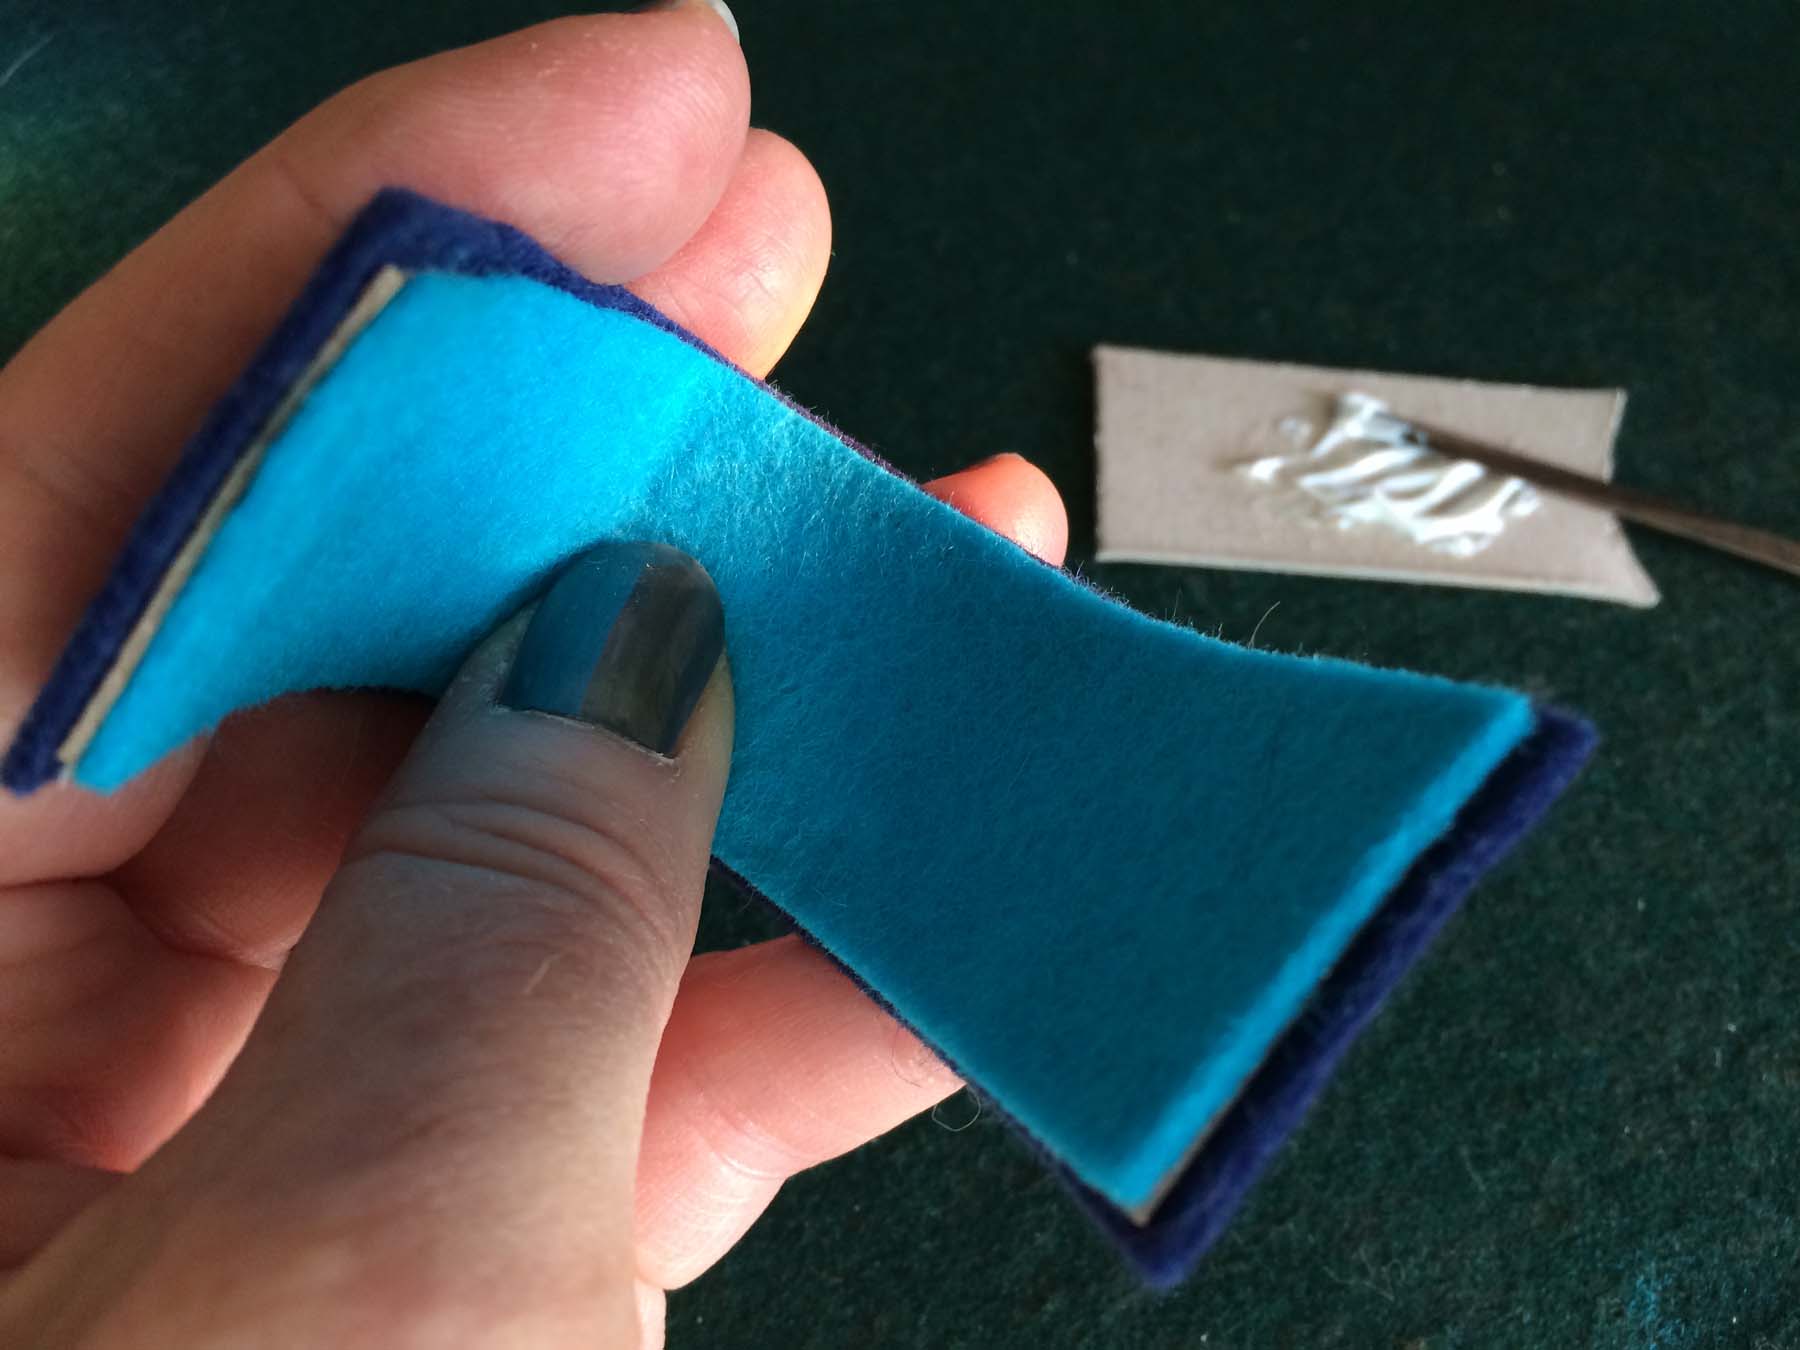 Then you can glue the round base pieces similarly (outer felt base, cardboard lining, inner felt) and leave both pieces to dry for an hour or so.
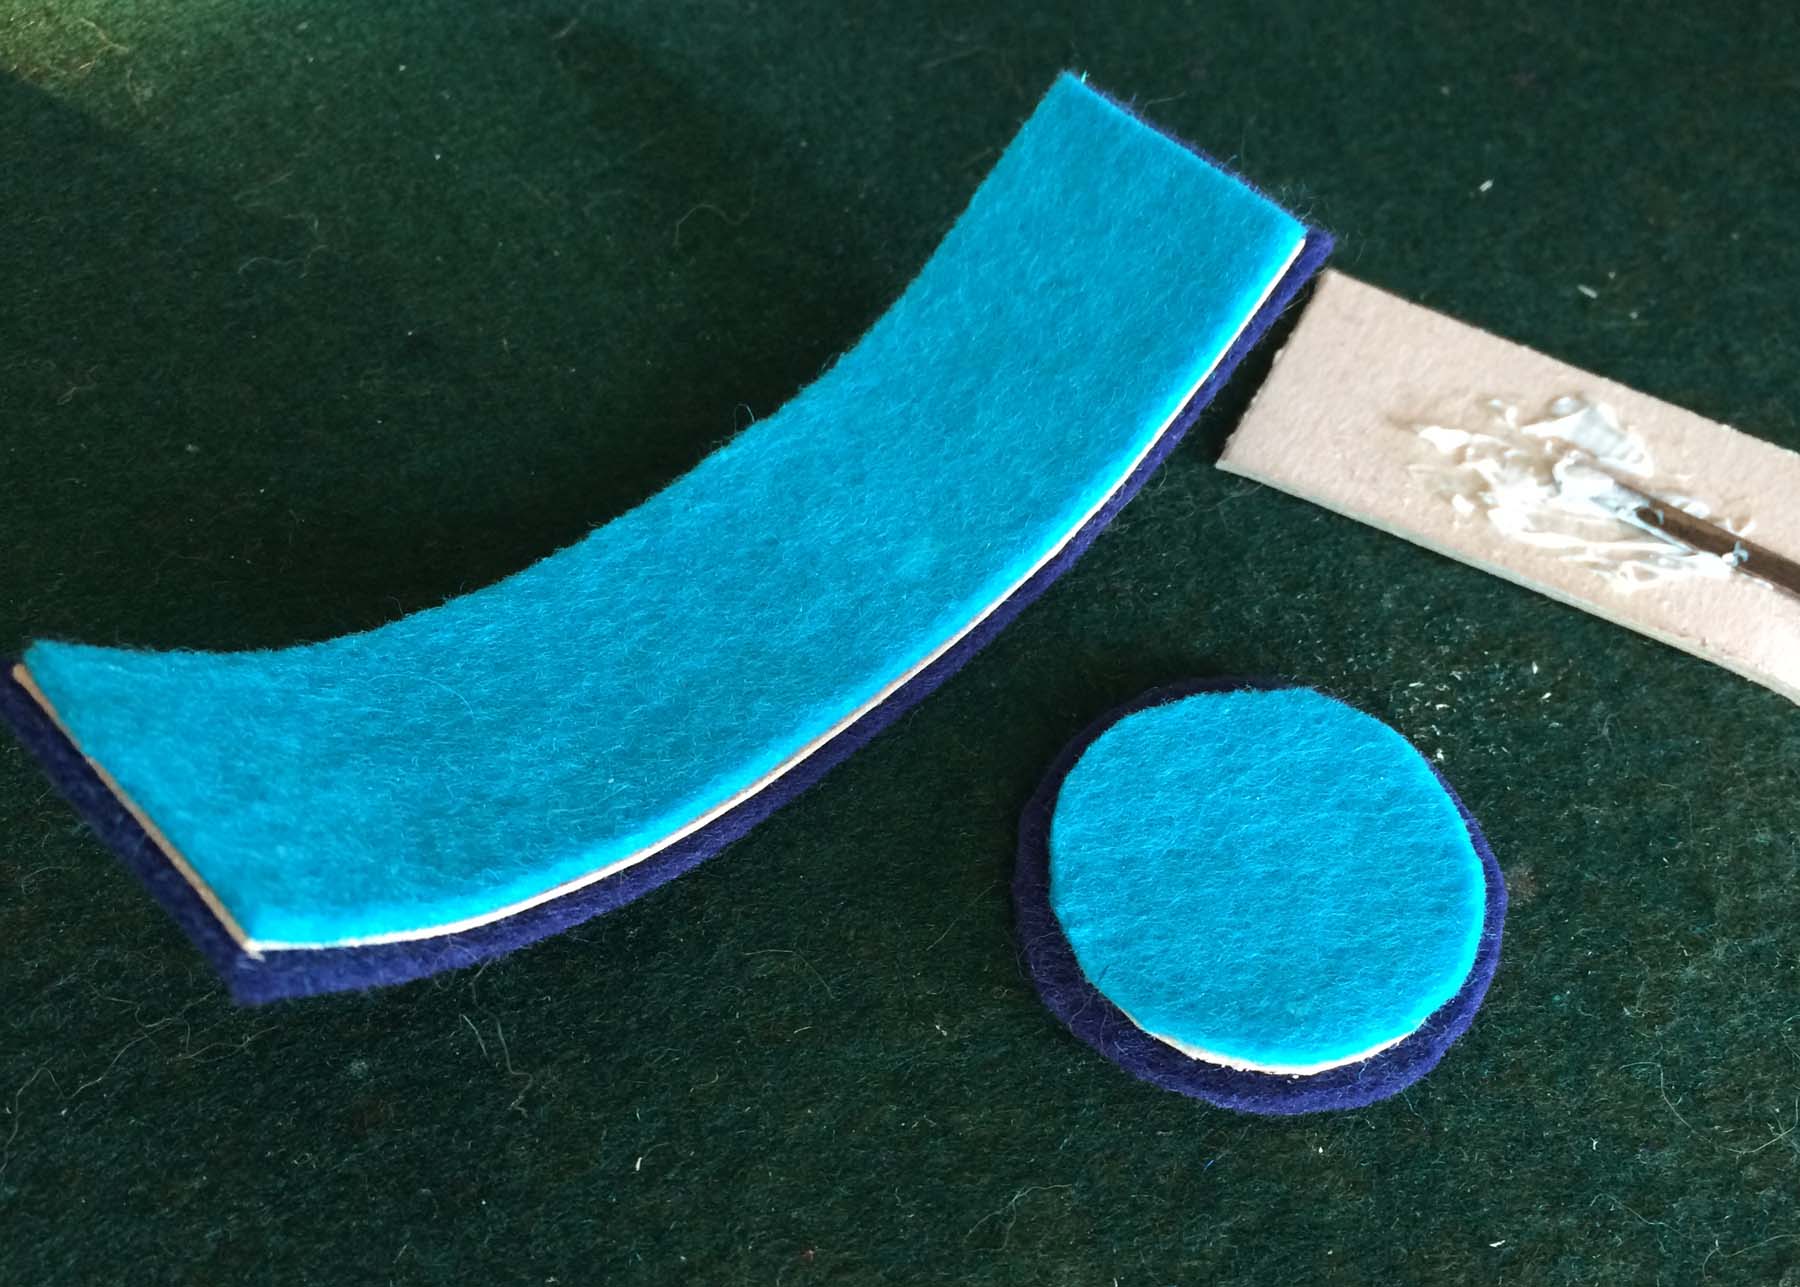 When the glue has dried satisfactorily, overstitch the top of the cylinder sides with blanket stitch (or oversewing stitch if you prefer)
 When you have completed working round the top of the cylinder, join the two ends together, still working in buttonhole stitch.
 And work down the side of the cylinder, using what I believe is called Buttonhole Insertion stitch (you can see a rather more elaborate version of that stitch here)
 Until you have completely joined the sides of your tube together.
 Then you can join the felt base to the tube, again using Buttonhole Insertion stitch.
 And working all the way round until you have joined bottom and sides completely.
 It should look like this.
 Now to make the lid.
In one of my early attempts (the purple and pale blue example below), I followed the same procedure as when making the sides and base. I made a felt-cardboard-felt sandwich of two larger rounds of felt and one smaller piece of cardboard (see measurements above). When the glue was dry, I stitched round the circumference and sewed the lid to the base.
Now to have some fun with decoration, I thought! I glued on some leaves, let them dry, and then started to stitch. Big mistake! Because, of course, the completed lid is really inflexible at this point making it very tricky to sew. I did manage to sew some beads on …
  And add a little stitchery to the leaves. But it wasn’t at all easy – didn’t allow for anything really fancy.
 So, what I recommend is that you embroider and decorate the top felt layer of the lid before you stick the lid parts together. I decided to work a Chain Stitch pinwheel on this lid.
 Then I added some beads.
 And when that was completed, I stuck the three layers of felt – cardboard – felt together.
 When the glue was dry, I blanket-stitched round the circumference, and finally stitched the lid to the base.
 To finish, I sewed on a bead fastener, and made a buttonholed loop to hold the tidy shut. Et voilà! My completed Tape Measure Tidy!
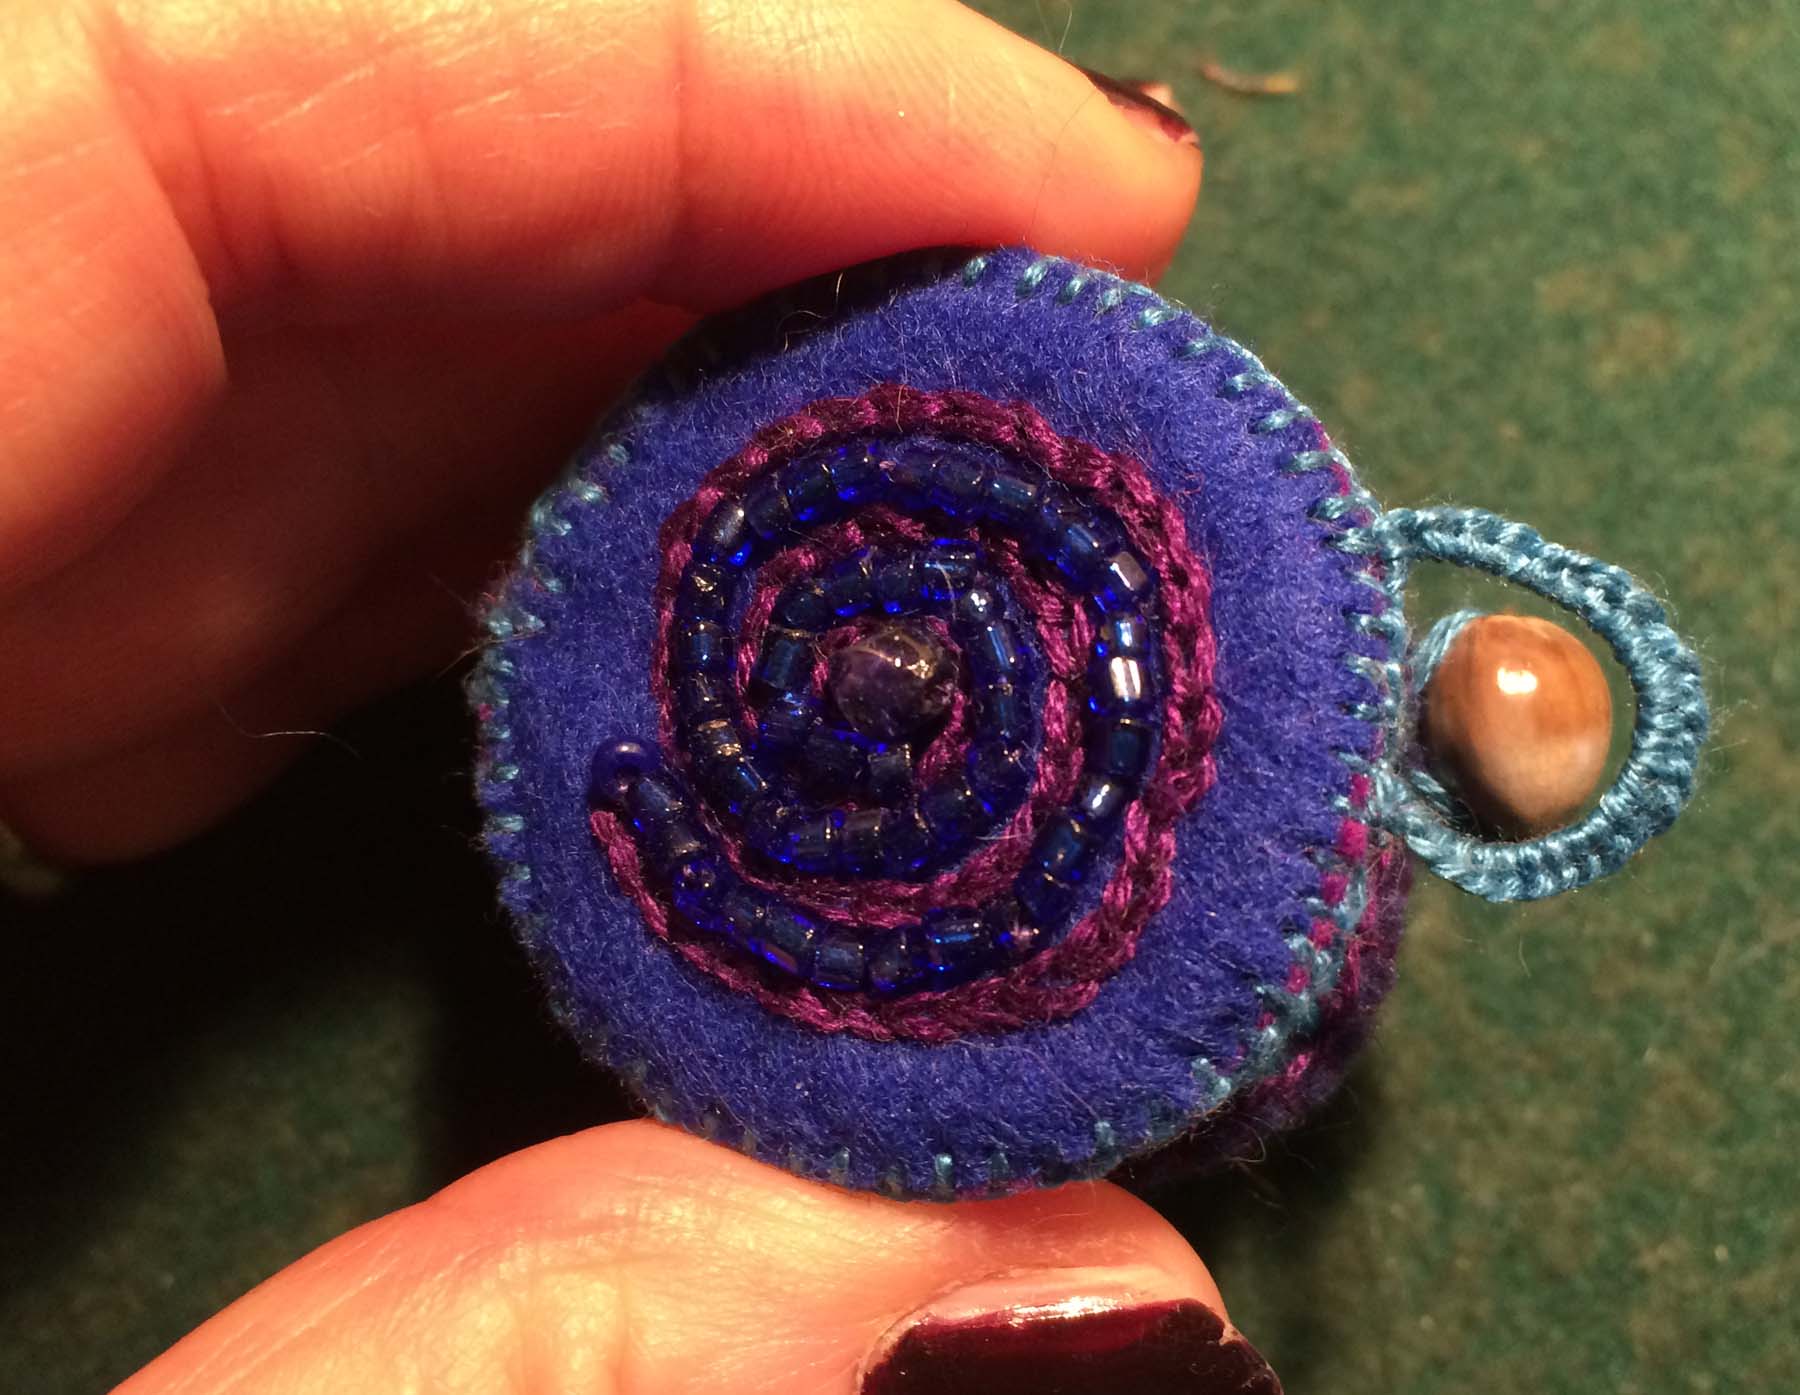 No, better than that, seven little Tape Measure Tidies! My trials and experiments along with the three old ones my mother had made.
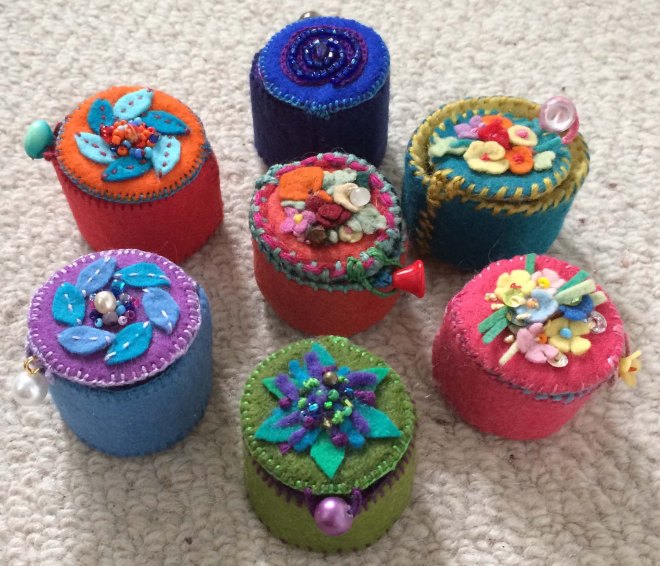 Should you wish to make a Tape Measure Tidy of your own, I hope you’ll find this tutorial helpful. If any bits are muddled, incomprehensible or downright wrong, please let me know ….

Think I’ll give it a go, it will be good to have something to make in the evenings. Probably use it to keep some of my earrings in!
LikeLike
Hope you enjoy making them! I do like your idea of keeping earrings in them but if you have half as many earrings as me, you’ll have to make several – or you make a larger one, I suppose ….
LikeLike
Wasn’t really thinking straight, no way would my earrings fit in such a tiny box but I think my diamond rings would fit just fine, I don’t have that many!
LikeLiked by 1 person
They are so pretty …. I’m going to have to make one!!!!
LikeLike
I look forward to seeing what you make, Carol – sure it’ll be lovely!
LikeLike
I didn’t realise such things as Tape Measure Tidies existed but now I know that I need at least one, possibly two. Yours look fabulous. Looking forward to digging out my felt scraps and putting them to good use.
LikeLike
Haha! Tape measure tidies is the name I’ve given them, Anne – don’t think they have a title as such, but I needed one for the blog. It does sound a bit twee … but I couldn’t come up with anything better. Have fun making them – hope you’ll sure your results with us 🙂
LikeLike
D > Aren’t you so patient and careful in not just making these, but also showing us how, ‘step by step’ as the saying goes.
LikeLike
Thank you, Denise. I’ve done very little felt or embroidery work in my life, so this was a real experiment for me (and the making of a tutorial too). I found myself completely lost in the detailed careful work – real slow stitching! So enjoyed it.
LikeLiked by 1 person
Great tutorial, what a lovely idea!
LikeLike
Thank you so much, Georgia!
LikeLiked by 1 person
Made my first one this afternoon, thanks for the idea and instruction. Wish I could show you here. It was great fun.
LikeLike
Just seen your pics on Instagram and it’s gorgeous!
LikeLike
What an amazing tutorial! I didn’t even think of tape tidies – my tapes are hanging on the table leg in a quiet untidy manner and I always manege to lose them 🙂 I hope my quiet inadequate sewing skills will be enough for something like this! Thank you fro sharing!
LikeLike
Thank you very much, Alina. It was my first tutorial and great fun to put together 🙂
LikeLike
What a wonderful idea! These are so charming, just adorable. I used to make little birds out of felt, and stuff and embroider them. I have tape measures being mangled in drawers all over my house, so I need to make some of these immediately!! Lovely tutorial, and how lucky you are to have these things that your mother made.
LikeLike
Thank you 🙂 – they are such fun to make, and do tidy away the tape measures tidily! Your little birds sound just lovely 🙂
LikeLike