
Many many moons ago my mother stitched me a fabric roll to contain my knitting needles. She made it beautifully, and I have treasured it and appreciated it for all these years …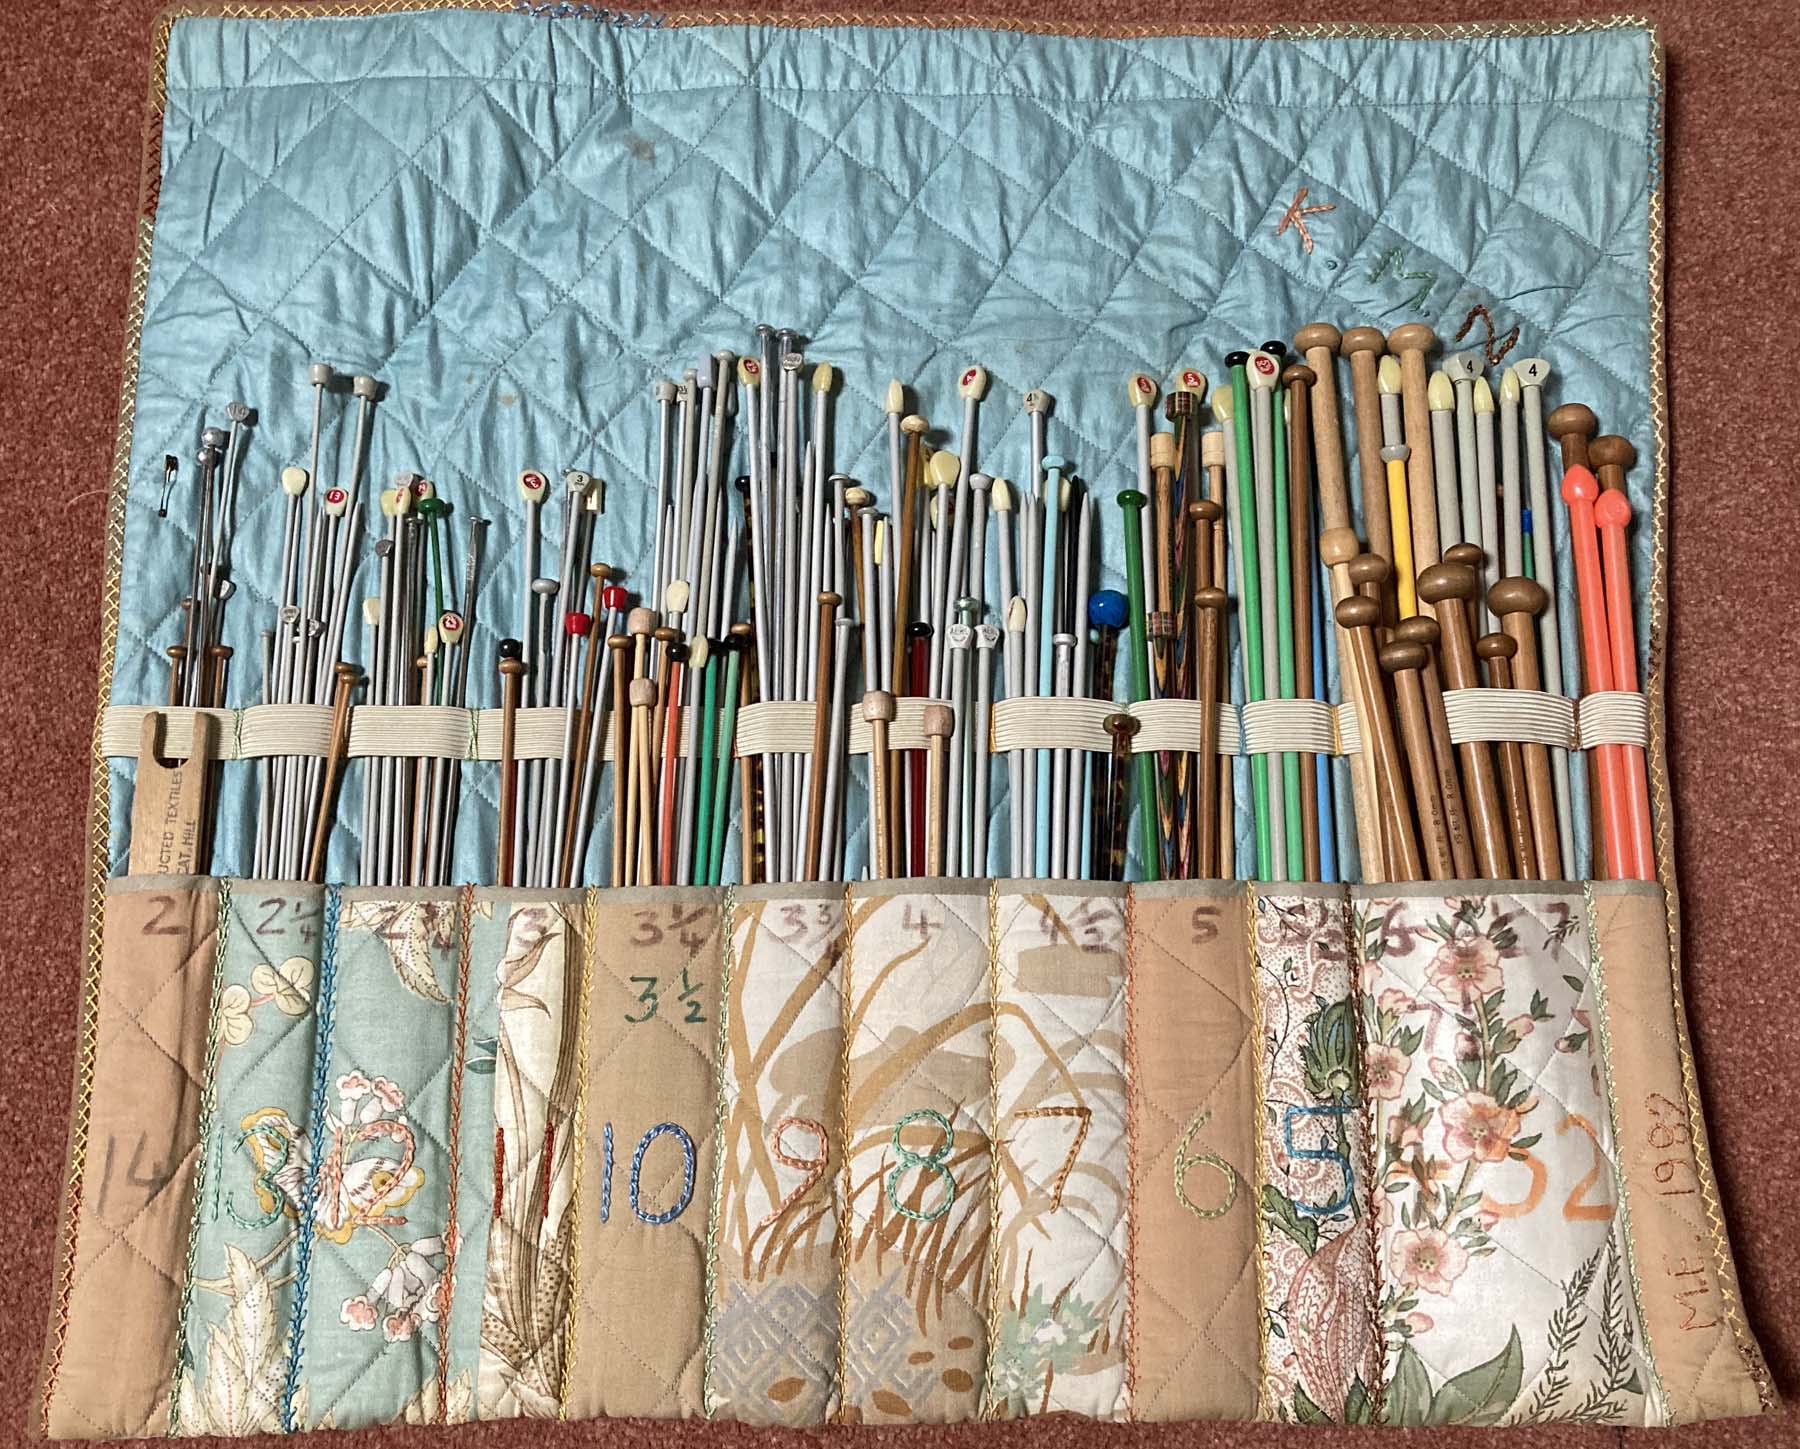 Thirty eight years ago, in fact …
 But over those 38 years, my knitting style had changed, and I have acquired modern needles that just don’t fit in the old holder. So I also had a box of knitting paraphernalia that looked like this…
 Recently, I saw this nifty little knitting needle holder on my Instagram feed, and a germ of an idea was sown. That’s just what I need!
  So I assembled my fabrics and treasures. It was very important to me that I make use of some of my nicest pieces of material for this project as I knew I was going to make something that would be a good friend for quite some time. In particular, I had quite a few pieces of beautiful Japanese fabrics and I thought they would look very well together.
I was also keen to restrict myself to what I could find in my own stash. Fabrics, of course, but also buttons, zips, ribbons etc  Some of my early ideas (such as incorporating this charming rabbit embroidery as a flap to keep the needles in place) never materialised …
 It was definitely a very red project …
 First I made myself what all good dressmakers will know as a muslin (from an old sheet) …
 This was absolutely key to my whole project, and I referred back to it again and again as I progressed. It made clear to me, for example, that I had so many 4 mm needles that I would need a double pocket for them.
My muslin came our right at the beginning, before I had even cut any of my fabrics up, as I worked out exactly what size I was going to be working to … This then is the back layer (a wonderful piece of Japanese fabric my daughter gave me one Christmas) stitched onto the wadding (an old mattress cover), and ready for the second layer …
 Here is the second layer, and you can see how I used the muslin to mark out the pocket spacings …
 Kindly Ilsa dropped by at this point to cast a critical eye on my work …
 No, Ilsa, that’s not helpful!
 With Ilsa out of the way, it was now time to fit the third and final layer of back fabric …
 And once again consult the muslin for the placing of the pockets …
 Marking the stitching lines carefully with water erasable marker …
 Adding a few pieces from old dresses of mine to complete the centre panel …
  Just a little bit tricky to embroider the numbering …
 Getting a little carried away with the embroidering now …
 With the inner centre panel completed, it was time to move on to the side panels. I planned to make pockets to hold various knitting aides – stitchmarkers as well as the wires for my Knit Pro Symphonie needles …
 There was just enough of this fabulous scrap of Japanese silk for the right side …
 I cut up a light net bag to make two see-through pockets to lie on top of the silk scrap …
![]() These were machine-stitched into place …
These were machine-stitched into place …![]() But I had to hand-stitch the poppers to close these bags …
But I had to hand-stitch the poppers to close these bags … On the other side, I decided to make two zippered pockets (reusing old zips of course). This fabulous batik printed lobster was part of my wedding dress – amazing really Stephen didn’t flee away quick …
 I handstitched the zips into place so as to be sure to get a really tight fit, and then machined the surrounding fabric to make secure pockets …
 Now for the outside cover. As it happened, I had been indulging in a little bit of happy mindless doodle-stitchery over the summer. This was an old dress passed on to me by a kind friend, and it lent itself so well to a bit of embroidery …
 It wasn’t quite long enough by itself, but was easy to extend with another piece of treasure from my stash. Now to quilt it all together …
 Just a few final touches now. My knitting needle holder needed an edging to finish it off. What could be better than these lovely little Japanese flowers …
  Perfect edging for this project! You’ll see that I also added a couple of strips of vintage ribbon, roses on the right, and on the left – most usefully – a centimetre tape measure. And in the top right hand corner … ?
 Why – feeling smug after all this machining – I gave myself Mrs Random-makes badge of sewing excellence!
![]() Just finally one thing to finish it all off before I put my knitting needles and accessories to the test – my own initials and the date …
Just finally one thing to finish it all off before I put my knitting needles and accessories to the test – my own initials and the date … In go all my knitting and crochet accoutrements! A place for everything, and everything in its place!
 I think the outside is just as pleasing …
 But it’s also a thrill when it’s all scrolled up. With great good fortune I happened to have a lovely Wallace#Sewell scrap in my stash just perfect for holding my fabric scroll stylishly together …
 And even the cherry blossom binding gives me a frisson when seen all scrolled up like this ..
 Now I can’t wait to start a new knitting project because first I’ll have to get some knitting needles out of my new knitting needle organiser! 🙂

That bag looks fantastic! Now kindly leave your door unlocked so I can sneak in and take it for myself…
No, seriously. What’s your full address?
(Teehee)
LikeLike
Ok, I know I’ve got to hide it away carefully!! Seriously – thanks for your kind comment. I loved making this 🙂
LikeLiked by 1 person
Dear Kay,
Your work is enviable as usual!! I love the cherry blossom binding and the badge of Sewing Excellence! The planning of this ‘roll’ alone was worthy of a badge 🙂 I have red tartan rolls for my dpn’s but my circulars are all in Zip Lock Bags! Keeps them from fighting with one another.
Nice Ilsa was able to help, haha The Japanese fabrics are a treat and KNOW that I still think of those Japanese pattern books from the last post. All the best.
LikeLike
Thank you, Susan! You sound very organised with those zip lock bags – the circulars are a real pain. aren’t they? I really loved doing this project – and using all my much-treasured Japanese pieces. 🙂
LikeLike
Fantastic! Such great attention to detail and process as always, and the most beautiful and useful object at the end. Love those vibrant oranges.
LikeLike
I know – those orangey reds are just gorgeous! I loved having a project to use all of these special pieces.
LikeLike
What a fabulous project that’s useful and beautiful and proof that a little planning goes a long way. I love it.
For your next project, will you please work out an efficient way to corral all the circular needles that I seem to have gained.
I think my summer project may be to replace the hurriedly made needle roll that my needles regularly fall out of.
LikeLike
Thank you, Anne – and yes, the planning was well worth it!
Funnily enough the matter of those circular needles came up when showing this project to local friends. I hate those needles because they are so unwieldy – and have put them all out! A great decision, and I now feel much happier. I replaced them a while ago with my Knit Pro Symphonie interchangeable needles which are much more biddable when not in use. One of my friends has a basket in which she keeps her circular needles – she’s so very organised that she still has the original plastic cases they came in so she can store them in there.
I have no idea how one might keep them tidily if not as she does! Sorry!
LikeLike
Oh Bother! I thought you’d have the answer! I use interchangeables too but they don’t go small or large enough for some projects so I also have circular needles (of all lengths it seems). I have the plastic cases but can’t always work out which needle came from which case because it turns out that not all 2.5mm needles are the same size.
LikeLiked by 1 person
Wow! You are so incredibly talented!
LikeLike
Thank you, Anita 🙂 honestly, I think most people could easily make something like this – just need time 🙂
LikeLike
That turned out to be a stunner 😊 …. absolutely beautiful!
LikeLike
Thank you very much, Annett, I’m very pleased with its practicality and the fact it used so many treasured scraps 😉
LikeLike
Thanks for tthis
LikeLiked by 1 person